How to Install a Water Softener In an RV in 20 Minutes

Shop Our Products
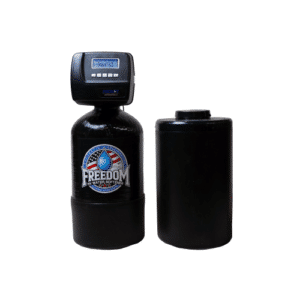
Freedom RV Water Softener System
Specifically for RV and fifth-wheel owners, this high-quality system guarantees your RV’s water is pure,
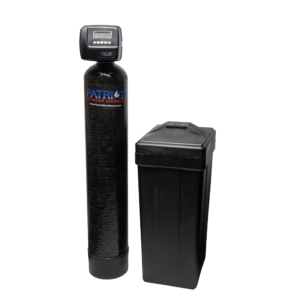
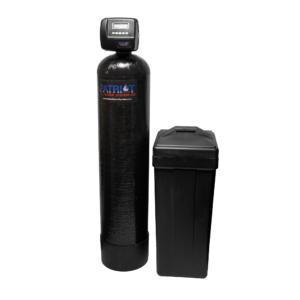
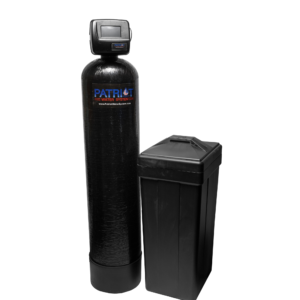
Traveling in an RV can be an amazing experience, but hard water can quickly become a nuisance, causing damage to your appliances and reducing water quality. Installing an RV water softener can help mitigate these issues, ensuring you have soft, clean water on the go. In this guide, we’ll show you how to install a portable water softener in your RV in just 20 minutes. Ready to dive in? Watch the video tutorial below or keep on reading, let’s get started!
Tools Required
- Wrench
- Screwdriver
- Pliers
- Teflon Tape
- Bucket
- Wiring Kit
Steps to Install an RV Water Softener
Step 1: Choose the Right Spot
Select a location near the main water line where you can easily access and monitor the water softener. Typically, this will be near the water inlet or utility bay.
Step 2: Connect to the Main Line
- Turn off the Water Supply: Ensure the main water supply is turned off to avoid any water leakage.
- Attach the Bypass Valve: Connect the bypass valve to the main water line, ensuring it’s tightly secured.
- Install the Inlet Hose: Connect the inlet hose from the water softener to the bypass valve.
Step 3: Add Salt
Fill the salt tank with the recommended amount of salt. Use high-purity salt pellets or cubes, which are specifically designed for water softeners. You can purchase the right kind of salt at most home improvement stores or online retailers. This is crucial for the regeneration stages and getting soft water.
Step 4: Flush the System
To flush the system, open the bypass valve and let water run through the softener for about 5 minutes. This helps remove any air and initial impurities from the system. Check for leaks during this process, ensuring all connections are tight and secure.
Step 5: Test the Water
After installation, test the water to ensure it’s soft and free of hardness minerals. You get a water hardness test kit from most hardware stores.
Don’t forget to regenerate your water softener as often as your manufacturer recommends after installation.
Do You Need an Expert?
If you can install an RV water softener yourself by following the steps in this guide, you’re all set! However, if you encounter any issues or simply prefer professional assistance, your local softener store should be able to help with the installation. Don’t hesitate to reach out to them if you need any support!
Why You Should Set Up An RV Water Softener
Using an RV water softener has several benefits that enhance your RV experience:
Protects Appliances
Hard water willcause scale build-up in your RV appliances, reducing their efficiency and lifespan. A water softener helps prevent this by removing the minerals responsible for hardness.
Enhances Water Quality
Soft water is better for your skin and hair, and it also improves the taste of your water, making it more pleasant to drink and use for cooking.
Reduces Maintenance
By using a water softener, you’ll reduce the need for frequent maintenance and repairs on your plumbing system and appliances.
Protects Your Investment
Your RV is a significant investment, and maintaining its condition is crucial. A water softener helps protect your RV’s plumbing and appliances, ensuring your investment lasts longer and remains in top condition.
Common Challenges and Solutions
Hard Water Build-up
Challenge: If you notice hard water build-up even after installing the water softener, it may be due to insufficient salt levels or improper regeneration settings.
Solution: Regularly check and maintain the salt levels in your softener. Ensure the regeneration cycle is set according to the manufacturer’s instructions. If problems persist, it might be necessary to clean the resin tank or consult a professional.
Leaks
Challenge: Leaks can occur if connections aren’t tight enough or if there’s a crack in the hoses or fittings.
Solution: Use Teflon tape on all threaded connections to ensure a watertight seal. Regularly inspect the hoses and fittings for any signs of wear and replace them if necessary. Tighten all connections securely.
Water Taste
Challenge: If the water tastes salty, it might indicate that the water softener is using too much salt or that the brine tank is malfunctioning.
Solution: Adjust the salt dosage settings according to the manufacturer’s instructions. Clean the brine tank and check for any blockages that might affect the regeneration process.
Inconsistent Water Softening
Challenge: Sometimes, the water softener might not consistently soften the water.
Solution: This can happen if the system is not regenerating often enough. Increase the frequency of regeneration cycles. Additionally, ensure the water flow rate matches the softener’s capacity.
Maintenance and Upkeep
Challenge: Regular maintenance is crucial for optimal performance.
Solution: Schedule regular maintenance checks, clean the resin tank periodically, and replace the salt as needed. Keep a maintenance log to track any issues and services performed.
Conclusion
Installing an RV water softener is a straightforward process that can significantly improve your water quality while on the road. By following the steps outlined in this guide, you’ll ensure a smooth and efficient installation. Remember, if you ever need assistance, we’re here to help. Enjoy your travels with soft, clean water in your RV!
FAQ
How do you hook up a water softener to the main line?
To hook up a water softener to the main line, you’ll need to turn off the water supply, attach the bypass valve to the main line, and connect the inlet hose from the water softener to the bypass valve.
What are the benefits of using a water softener in an RV?
Using a water softener in an RV helps prevent scale build-up in appliances, extends the lifespan of plumbing, improves water quality for drinking and cooking, and enhances the efficiency of soaps and detergents.
What type of salt should be used in an RV water softener?
Use high-purity salt pellets or cubes specifically designed for water softeners, which can be found at most home improvement stores or online retailers.
How do you know when it’s time to add more salt to the water softener?
Check the salt levels in the brine tank regularly. When the salt level drops below half, it’s time to add more salt. Some systems also have indicators to alert you when salt is low.
How do you winterize a water softener in an RV?
Drain all water from the softener, disconnect it from the water supply, and store it in a warm place. Use RV antifreeze in the plumbing system to prevent freezing.
Can a water softener be used with well water in an RV?
Yes, a water softener can be used with well water, but it may require additional filtration to handle iron, manganese, or other contaminants commonly found in well water.
Do you need any special tools to install a water softener in an RV?
Basic tools like a wrench, screwdriver, pliers, Teflon tape, and a bucket are usually sufficient for installation. Some installations may require a wiring kit if the system is electrically operated.
Share:
Talk to A Water Quality Expert
Shop Our Products

Freedom RV Water Softener System
Specifically for RV and fifth-wheel owners, this high-quality system guarantees your RV’s water is pure,


How To Maintain Your RV Water Softener
Taking care of your RV water softener keeps your plumbing safe and your appliances running smoothly. This guide covers how to handle both self regenerating and manual units, troubleshoot common issues, and some helpful tips to keep maintenance easy.

6 Tips on How to Choose A Water Softener
To choose the right water softener, consider your household size, water usage, water hardness, regeneration method, salt-based vs. salt-free systems, installation, and maintenance needs.

6 Signs You Need To Replace Your Water Softener
You should consider upgrading your water softener if:
1. Your system is over 10-15 years old and losing efficiency.
2. You notice hard water symptoms like chalky residue or dry skin, even after maintenance.
3. Your softener requires frequent, costly repairs.
4. You want to save money with a more energy-efficient model.
5. You need advanced features like better regeneration cycles or programmable controls.
Join Our
Newsletter
Get the latest information, and exclusive offers on water softening and purity solutions
